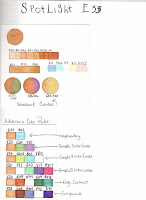
I started my book with Skin Tones. Then there is a page devoted to each type of hair color; brunettes, blonde's, blacks & reds. Here is a sample of one of those pages.
I also have pages on doing Whites, Lilacs, Blues, Denims, Greens & Creams.
Next, comes a couple of pages on Shadowing: Clothing and other objects.
Then I move onto Landscapes, Trees & Leaves.
I have a couple of pages of how to color Woods of all kinds.
Then Stones, Bricks, Rocks & Pebbles.
I have a couple of pages on how to do Oceans, Lakes & Ponds.
I have a section of how to do Eyes & eye highlights.
Then a page on How to Do Glass and Metals, Fur, Misc Techniques using the Colorless Blender. How to do Translucent objects, like overlaying balloons.
Pages on doing Vintage and Pastels and Watercolor (all with Copics of course).
I then have another Techniques section where I have how to Flicking, Blending, Feathering, Scribbling, ET.
Then I have a Spotlight Section that I will add to as Marianne Walker spotlights colors.

Finally, another section on "Advanced Skin Tones". Obviously, I wish I could have grouped some things together, but that is one drawback of this not being a ringbinder. You can't take pages out and move them around after they are done. But I know where everything is since I put it all in there.
On each page, it is important to record certain things. For instance, the type of paper you did the sample on, the exact Copic colors used, and credits to someone else that you learned it from for future reference. I even have a page in the very back with 6 samples of the same stamped, colored image on 6 different types of paper for comparison.
Okay, I hope this helps someone out there. I know when I started learning about Copics, even though I was able to find some limited examples of people color swatch books, I didn't feel they were detailed enough. I felt lost. That's why I gave so much detail in this post.
Tomorrow I will post some sample artwork I'm going to use in my classes.


Wow - you are SO organized! I would take a class from you if I lived in your area! It sounds like you've got it all together, girl!
ReplyDeleteWow, this looks great!
ReplyDeleteThis is fantastic, I should start a book myself. I can see it being a huge help!
ReplyDelete